Installation
Most kitchens install in
well under an hour.
We offer five mounting options to suit different walls, tools, and whether you'd like the panel to be permanent or removable. Each panel ships ready to fit, with everything you'll need prepared at our studio.
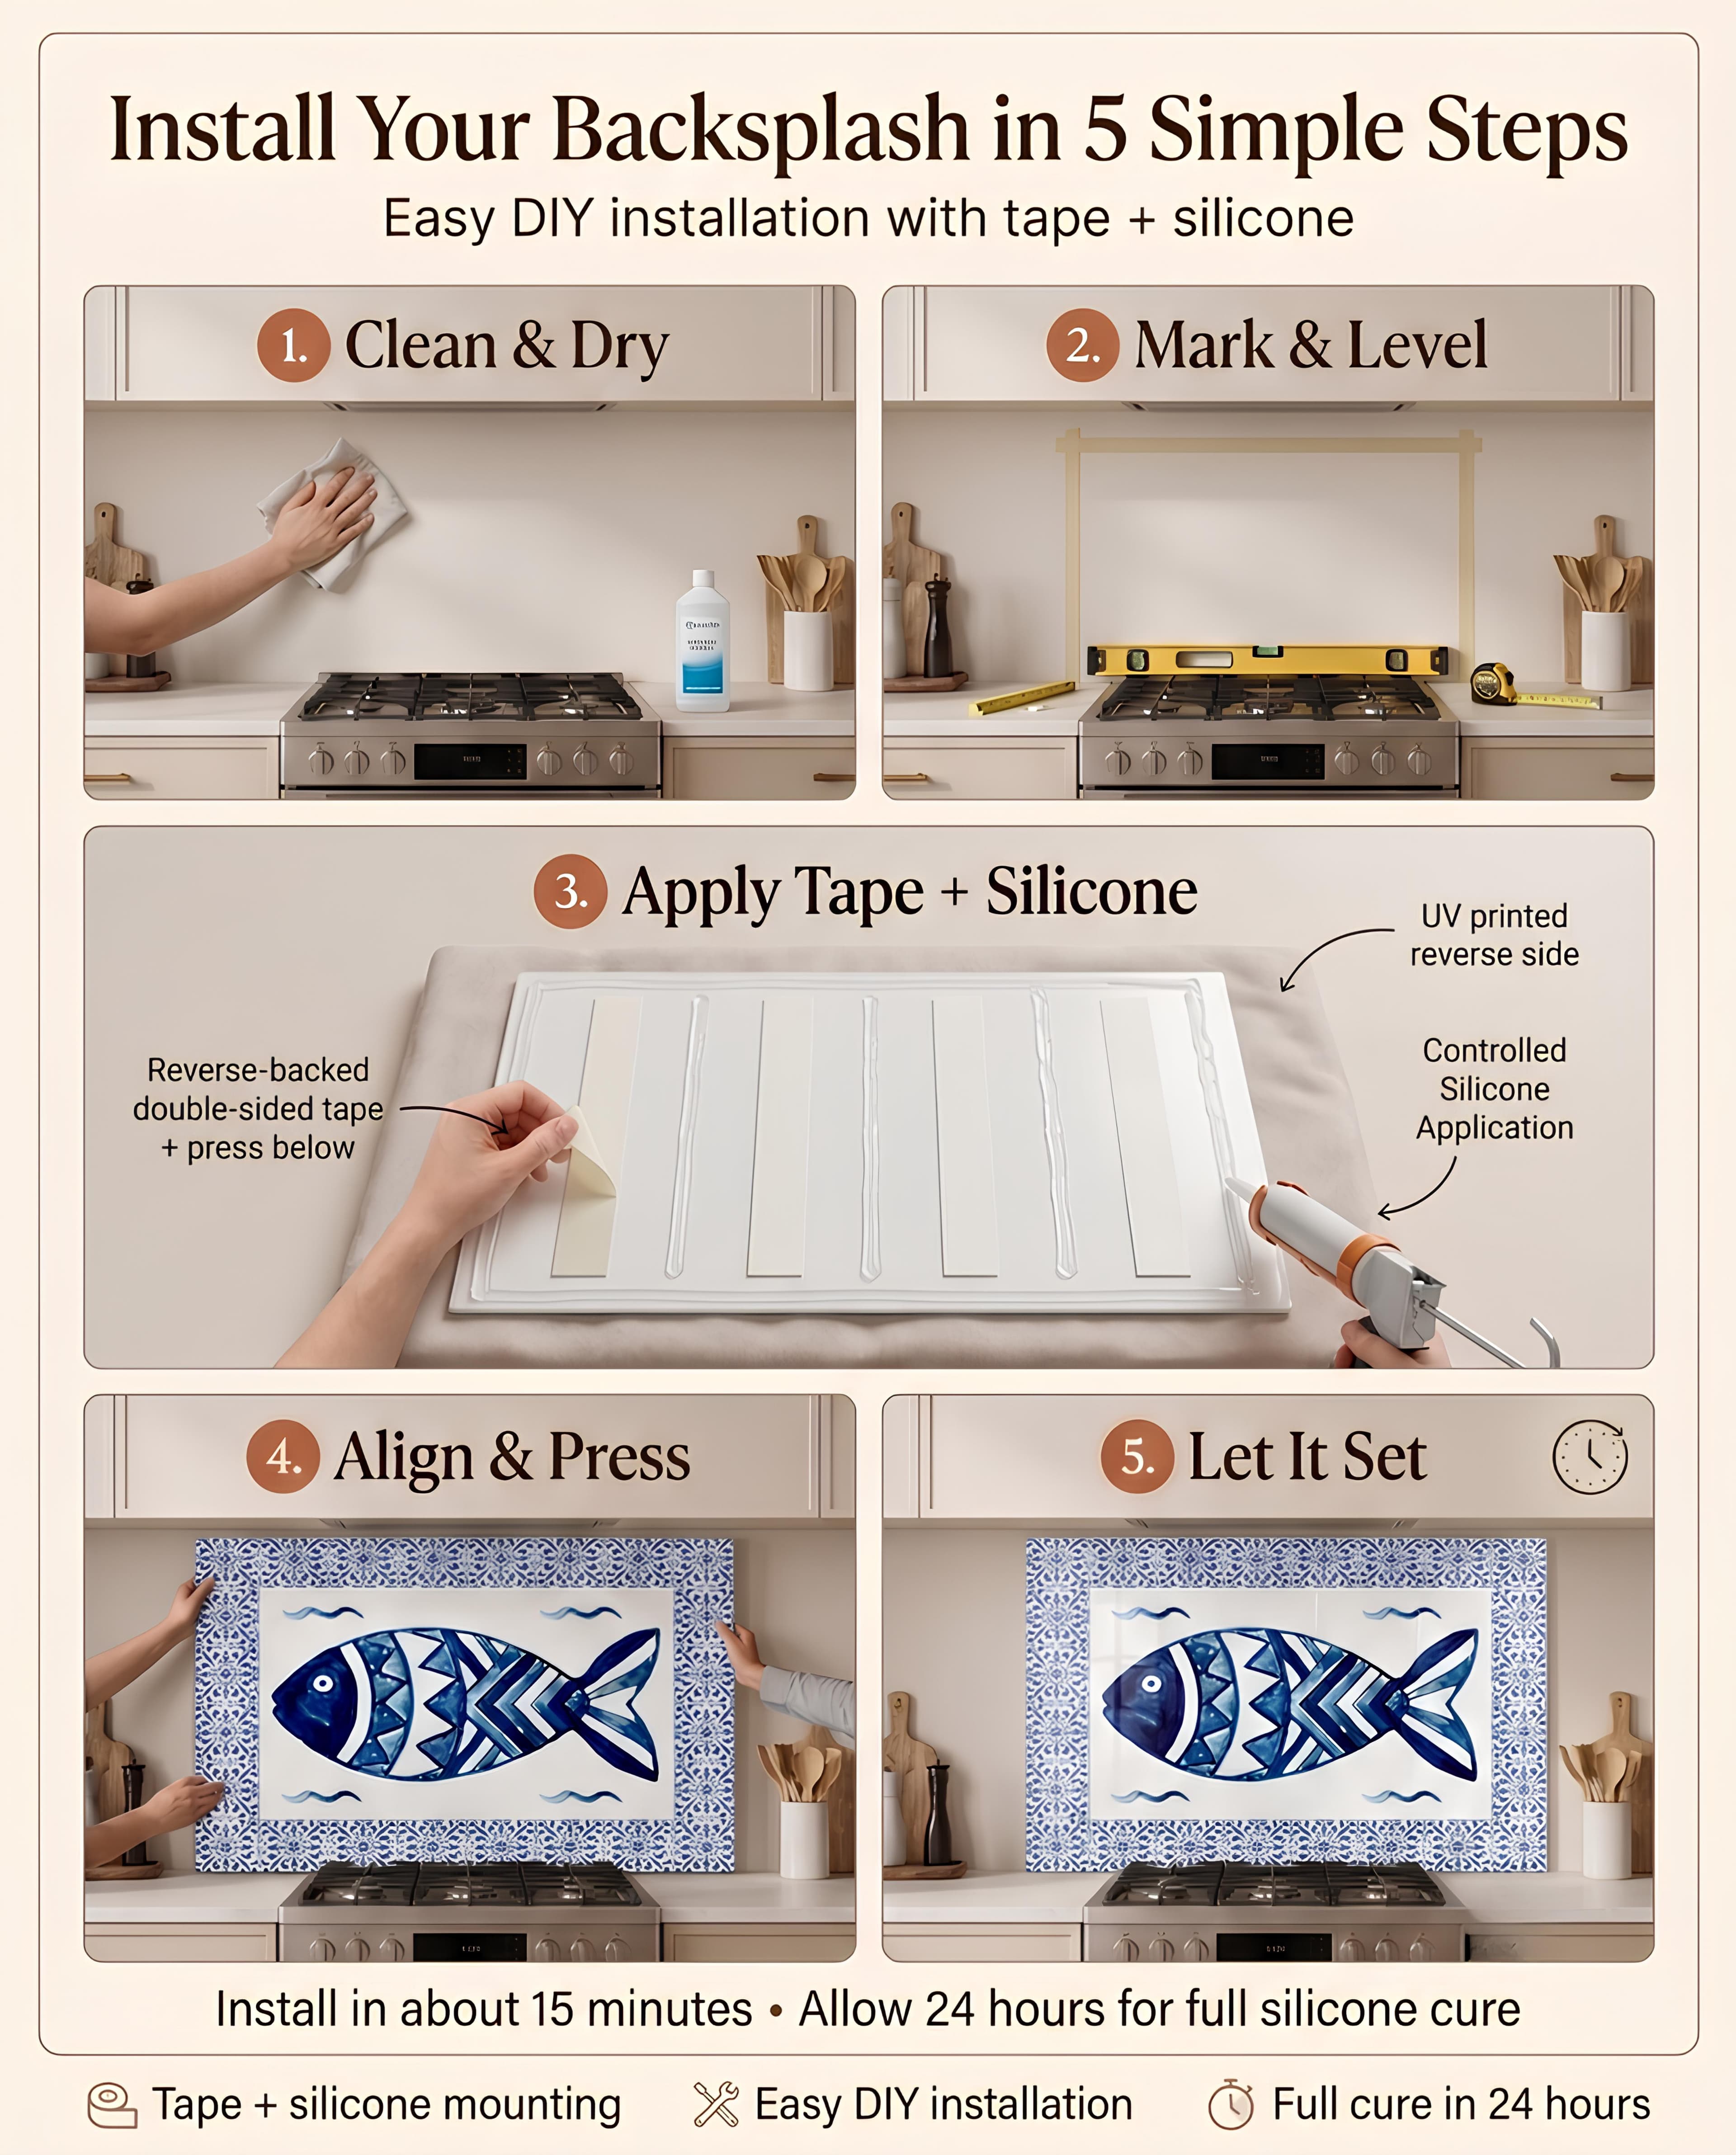
Choose a method
Five options. If you're unsure which suits your kitchen, we recommend Silicone + Tape — it works on most walls, holds beautifully, and removes the need to support the panel during cure.

1. Transparent adhesive silicone
Permanent · invisible · no drilling
A clear neutral-cure silicone bonds the panel directly to the wall. Invisible from the front and very strong. Best suited to tile, smooth plaster, or painted drywall. Removal is difficult once cured.
2. Double-sided tape
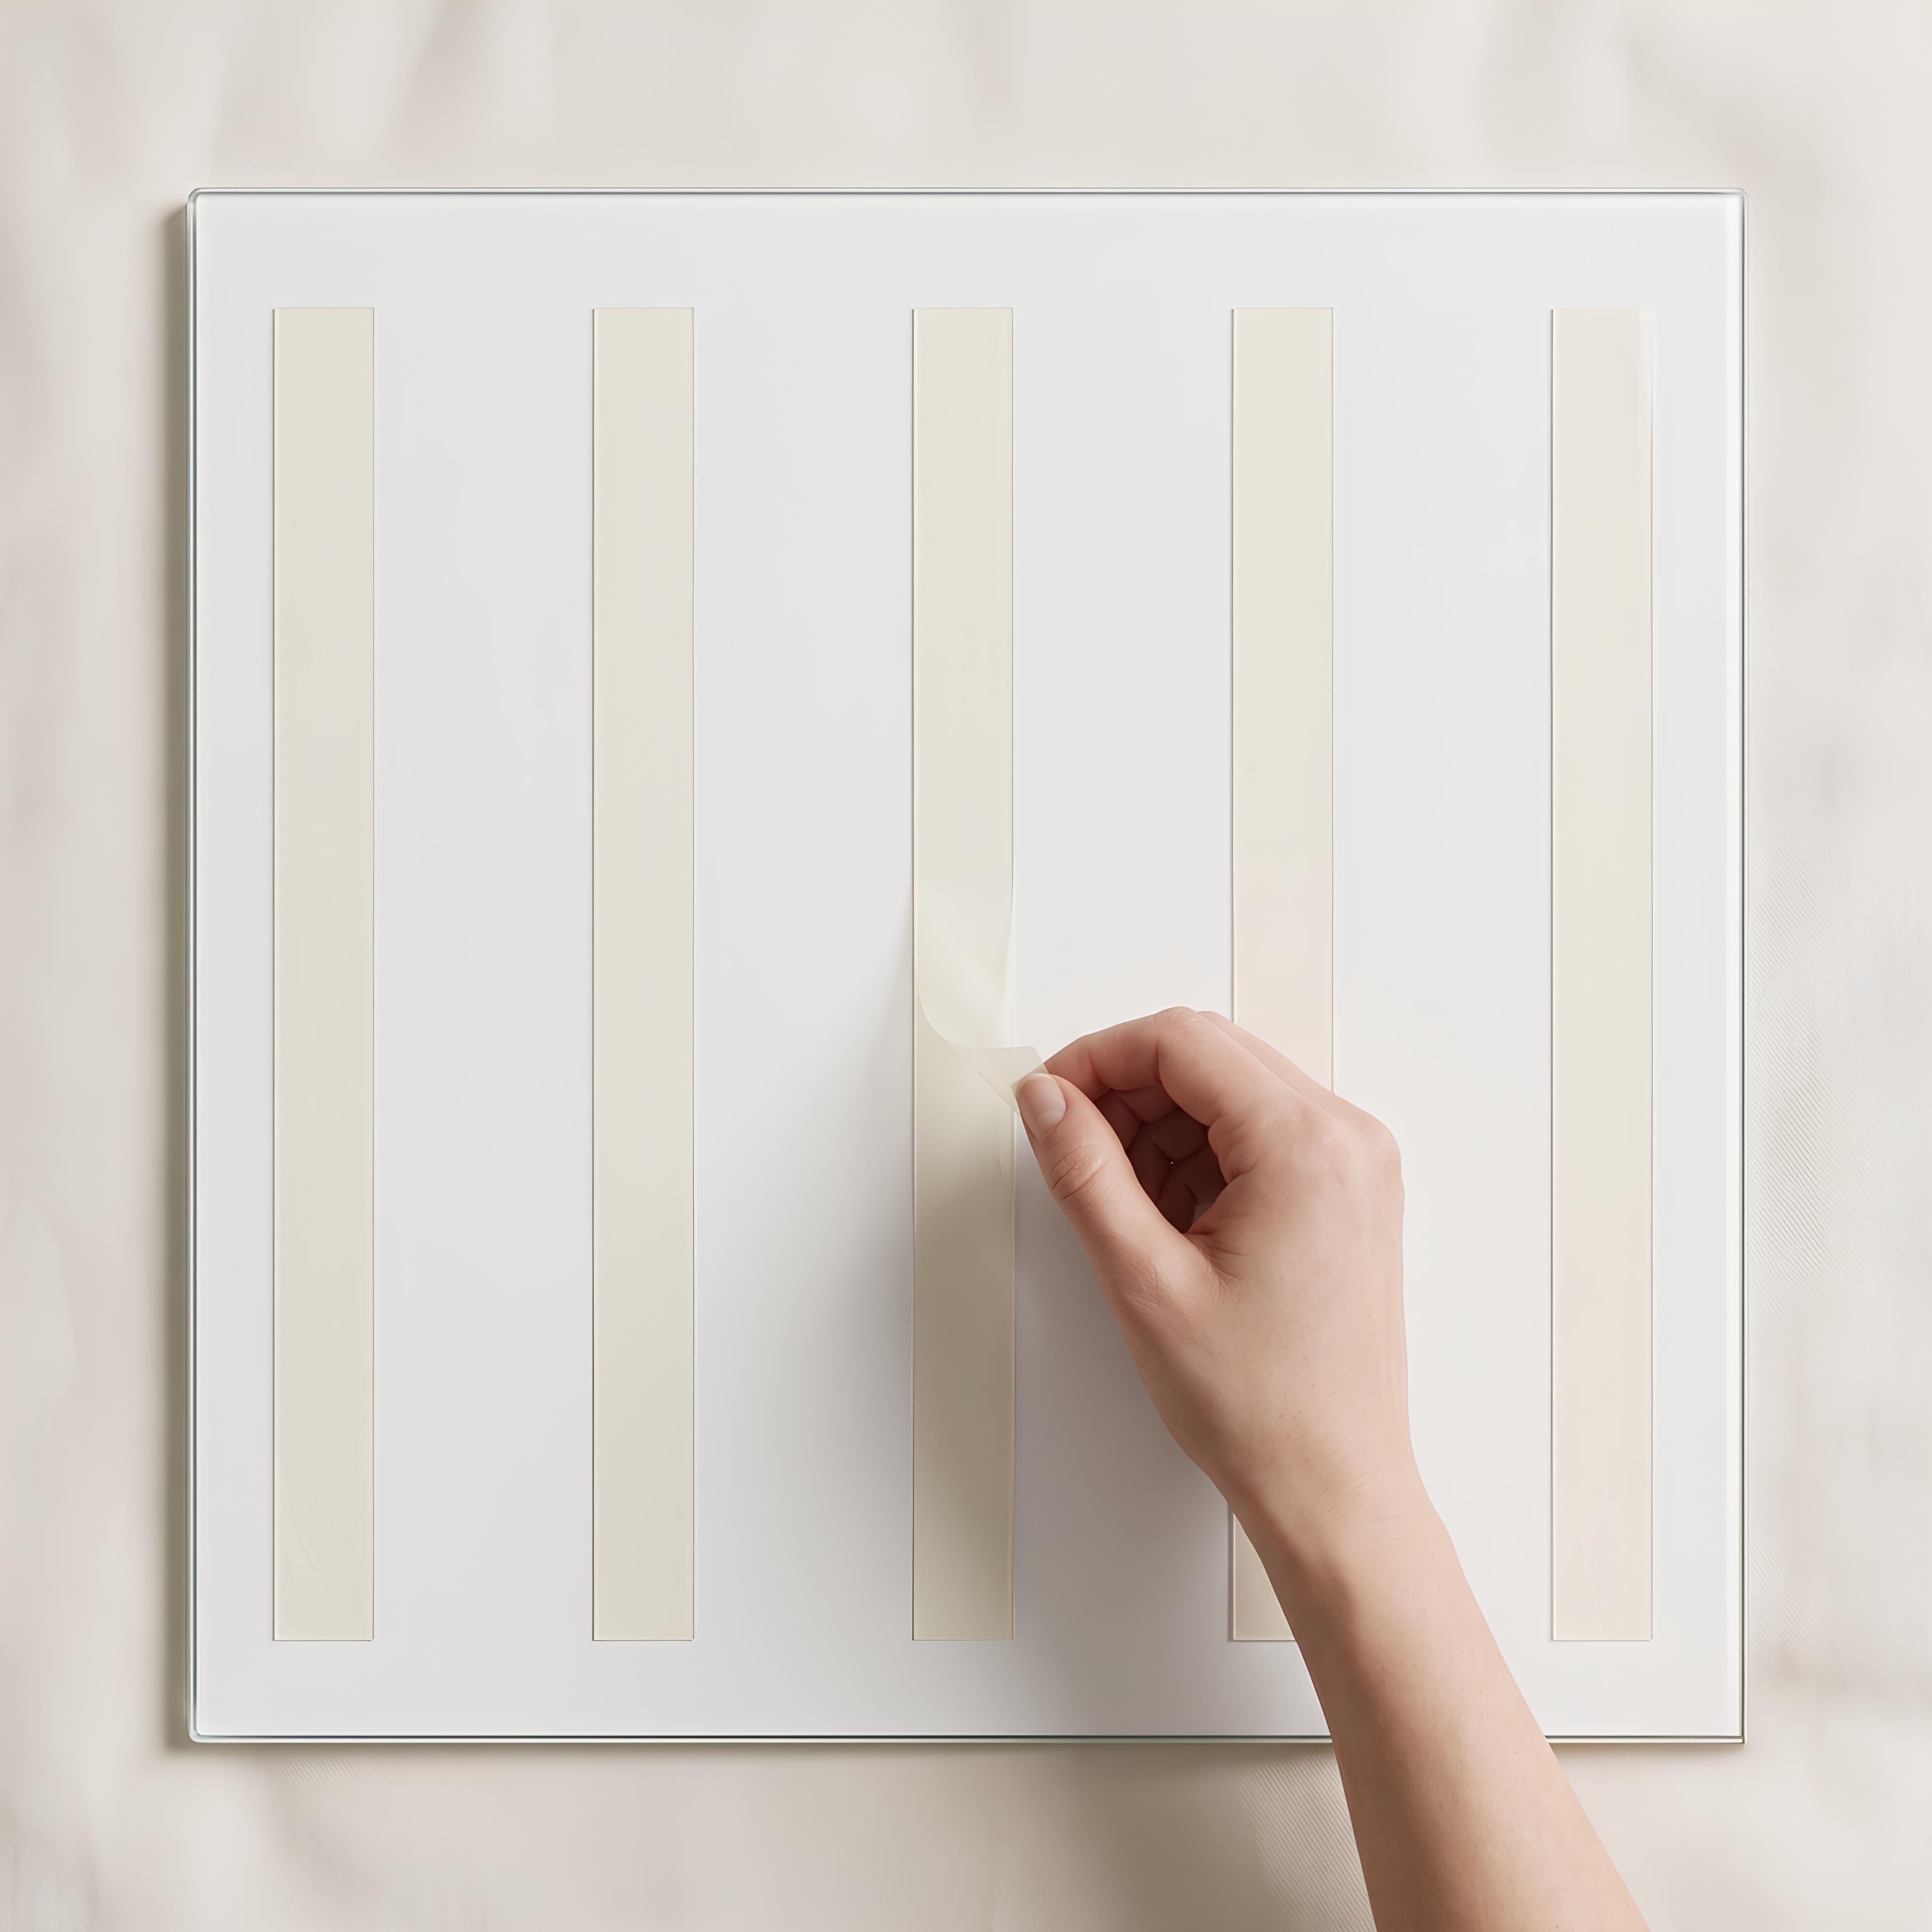
Instant · no drilling · removable
Heavy-duty industrial mounting tape pre-applied to the back of your panel. The fastest method — no cure time, no waiting. Best for smaller panels on smooth, painted walls.

3. Silicone + tape (recommended)
Permanent · invisible · no support during cure
Our most popular choice. The tape holds the panel in place instantly while the silicone cures permanently underneath. No need to brace the panel for hours, and the bond is as strong as silicone alone.
4. Screws (with stand-offs)
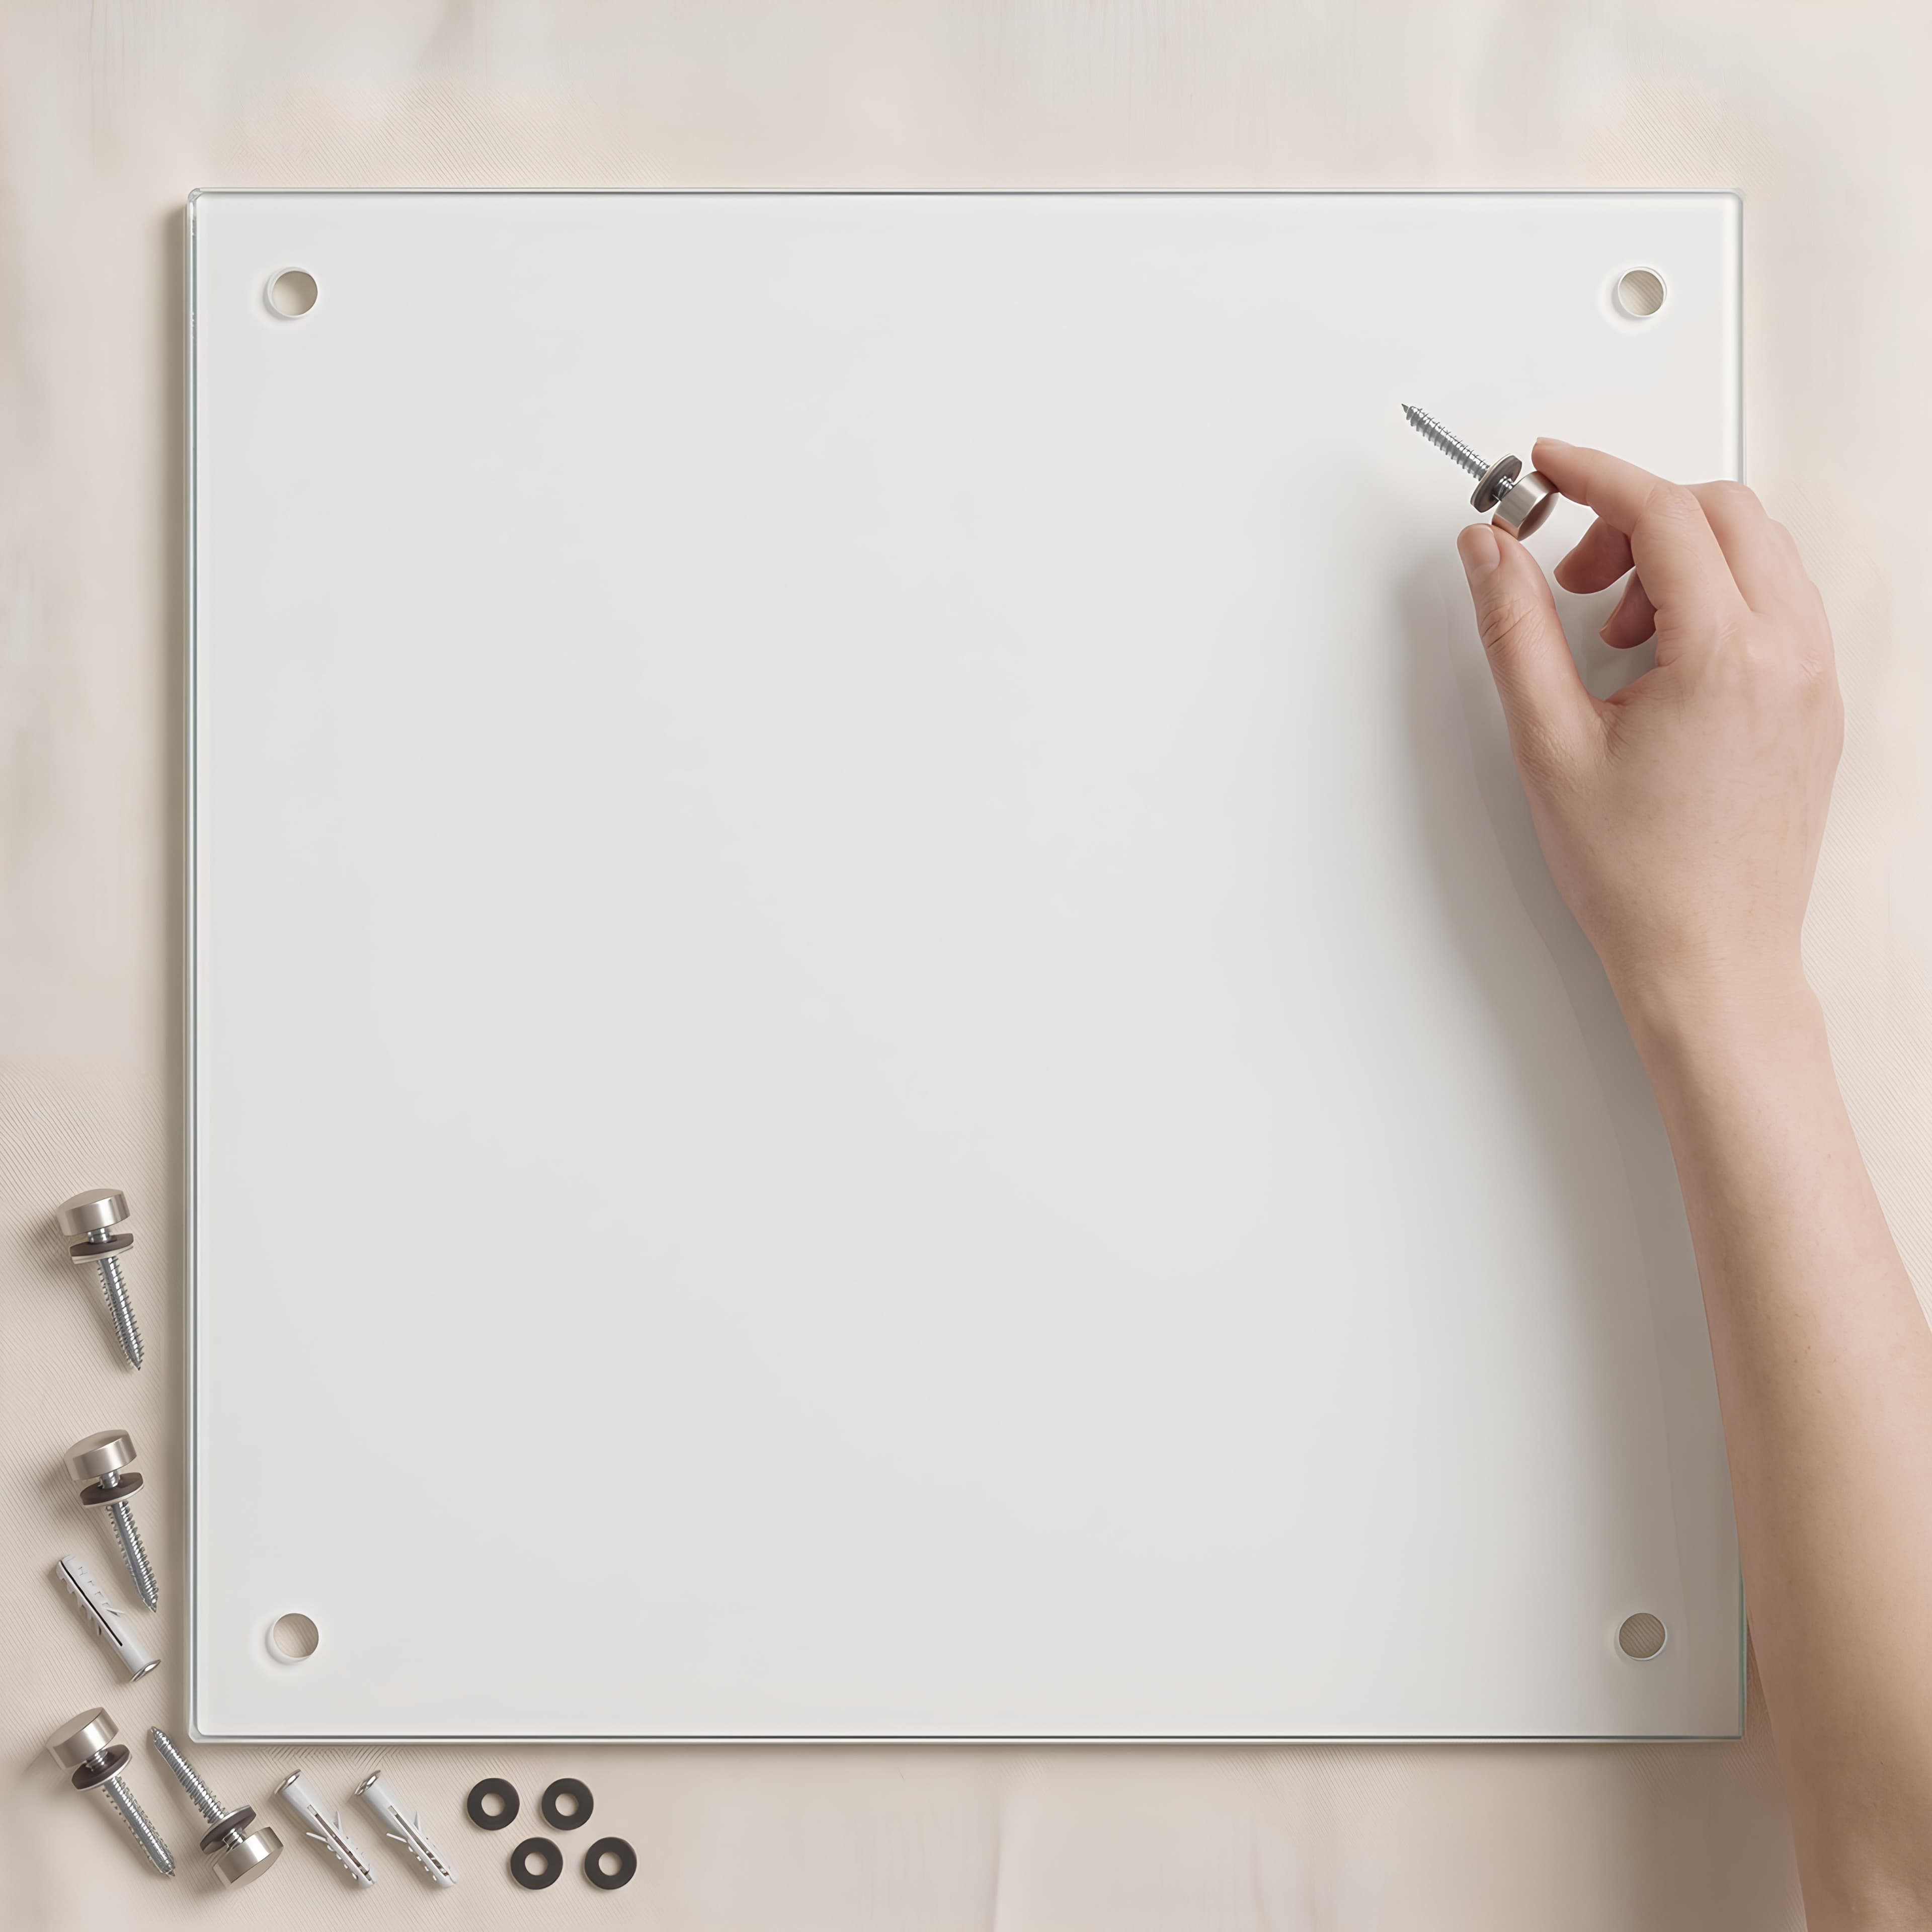
Removable · modern shadow line
Factory-drilled holes in your panel plus stainless-steel stand-offs that lift the glass approximately 8 mm proud of the wall. A subtle shadow line gives a clean, modern feel — and the panel can be removed later if you redecorate.
5. Metal hangers
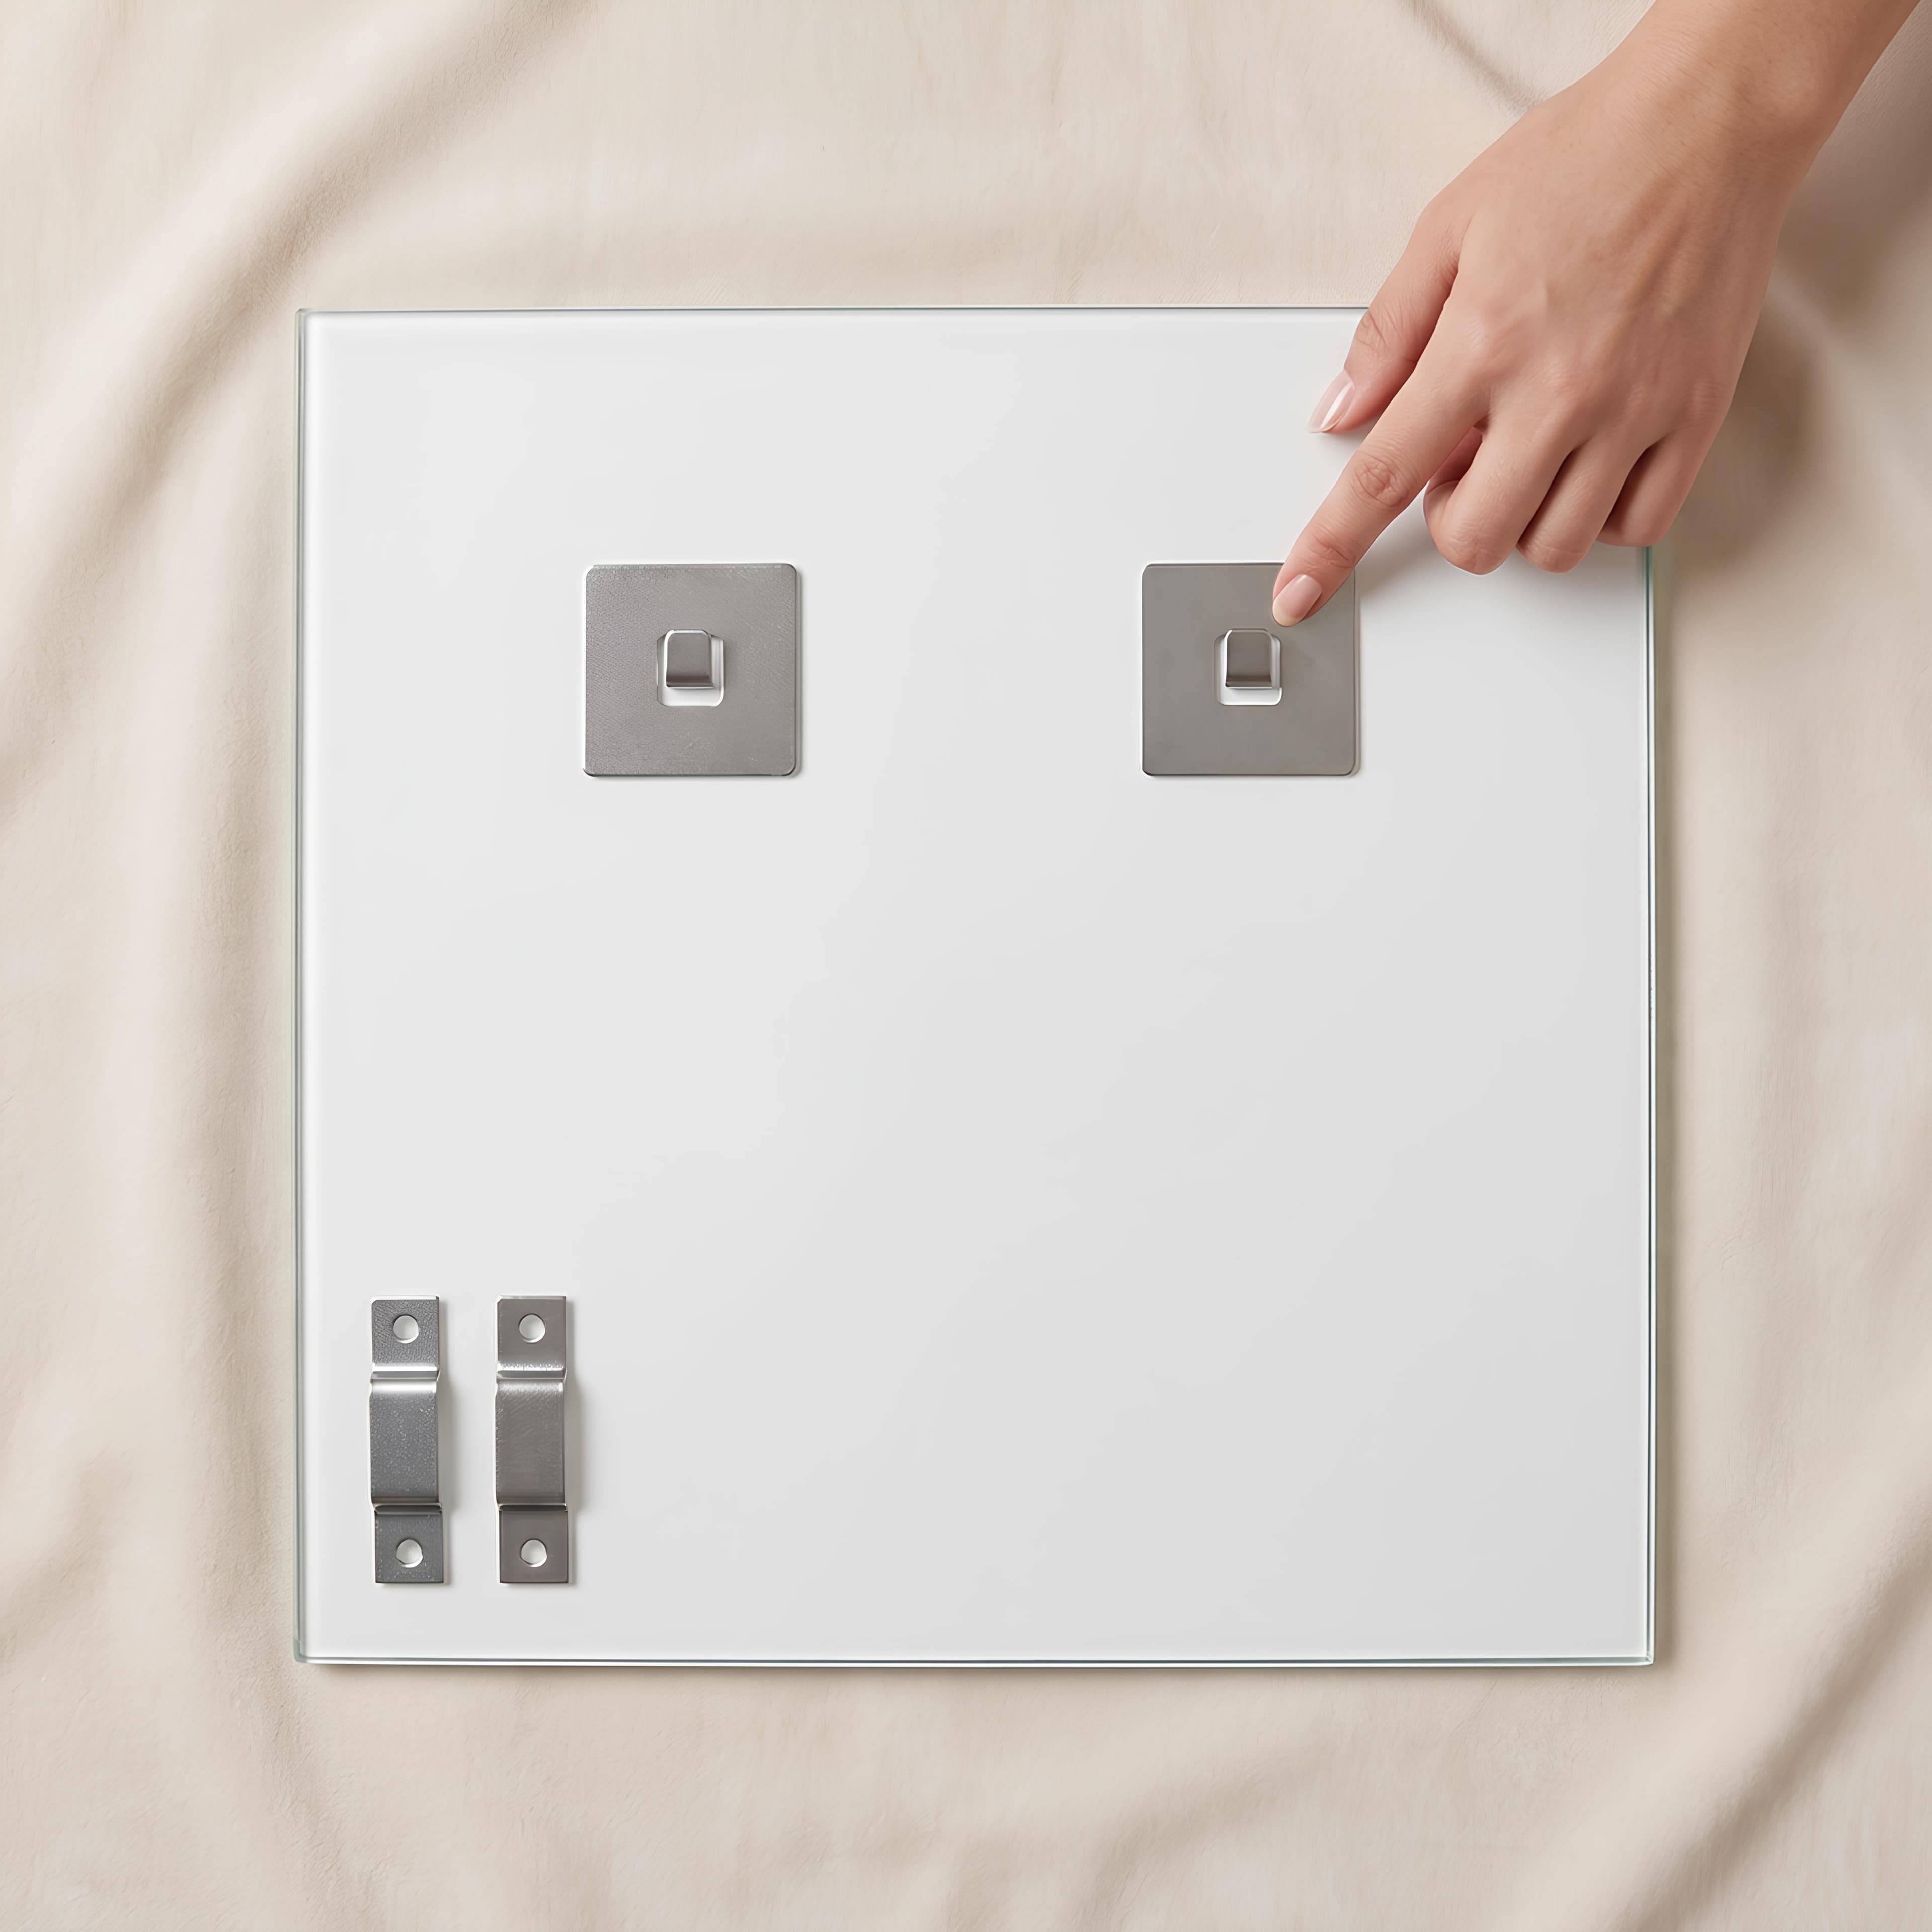
Fully removable · tool-free for the panel
Two metal brackets that fix to your wall; the panel simply rests on them. Truly removable — you can lift the panel off at any time to clean behind it or move it elsewhere. Ideal for rentals and changing displays.
What you'll need
For every method
- Spirit level
- Pencil and masking tape
- Tape measure
- Clean cloth and isopropyl alcohol
- A second pair of hands for panels wider than 80 cm
Method-specific
Silicone (methods 1 & 3): one tube of clear neutral-cure silicone sealant and a caulking gun.
Double-sided tape (methods 2 & 3): nothing extra — the tape comes pre-applied to your panel.
Screws (method 4): a drill, a masonry or wood bit matched to your wall, plus the stand-offs and wall plugs we send with the panel.
Metal hangers (method 5): a drill and a masonry or wood bit. The brackets and drilling template ship with your panel.
How to install
The first two steps are the same for every method. Step 3 and the final "set" step branch a little depending on which option you chose.
Prepare the wall
Wipe the wall thoroughly with isopropyl alcohol and allow it to dry completely. The bond is only as strong as the surface, so please take a moment to remove any cooking grease or dust before continuing.
Mark the position
Using masking tape, mark exactly where each edge of the panel will sit. Step back and look at it from across the room — adjust until it feels right. This step costs nothing now and saves a great deal later.
Apply your chosen mount
For silicone (methods 1 & 3): lay the panel face-down on a padded surface. Pipe a continuous bead of clear neutral-cure silicone about 1 cm from each edge, then a gentle zigzag through the middle — generous, but not excessive. For tape (methods 2 & 3): peel the protective film from the strips already applied to the back of your panel. For screws (method 4): hold the panel against the wall, level it, and mark each factory-drilled hole onto the wall. Set the panel aside safely, drill at each mark, insert the wall plugs, and screw in the rear collars. For metal hangers (method 5): mount the two brackets to the wall at the heights shown on the small drilling template we sent with your panel.
Lift the panel into place
We strongly recommend two people for any panel wider than 80 cm. Please always lift from the bottom corners — gripping the top causes the glass to flex, which can crack it. Align with your masking-tape guides, press evenly across the whole face, and use a spirit level to confirm it sits straight.
Let it set
For silicone (methods 1 & 3): initial set takes about thirty minutes — you can cook on the hob behind it once that time has passed. Full cure takes twenty-four hours; please avoid pressing on or leaning into the panel during that period. A few strips of painter's tape across the top edge for the first four hours help it sit perfectly while curing. For tape (method 2): no cure time — the bond is at full strength immediately. For screws (method 4): tighten each front cap by hand, taking care not to over-torque — the rubber washers seat themselves. Step back, re-check level, and adjust by loosening a single cap if needed. For metal hangers (method 5): the panel is ready to use straight away, and you can lift it off at any time to clean behind.
A few notes worth keeping in mind
- ▶Please lift from the bottom corners. Tempered glass is wonderfully strong against impact, but it does flex if you grip the top — and even a few millimetres of flex can cause it to crack. Two people are best for any panel wider than 80 cm.
- ▶Please don't drill or score the panel yourself. Tempered glass cannot be cut, drilled, or scored after manufacturing without shattering. If you find you need an opening we didn't make, please get in touch with us before installing — we'll send a replacement.
- ▶Avoid installing over loose or damaged tile. If your existing tile is loose or cracked, please repair the wall first. Adhesive cannot hold a panel onto a surface that is itself coming away.
- ▶Please leave a 2-3 mm reveal around the edges. If the panel is fitted tightly against cabinets on both sides, thermal expansion from cooking heat has nowhere to go. A small reveal looks intentional and helps prevent stress cracks over time.